Loving. Learning. Engineering. Life.


Wednesday, May 29, 2013

Rounding Out May -- My 1st Triathlon

Memorial Day has come and gone, my brief but fun vacation to California is behind me, and the only thing staring me in the face now is my first triathlon, which is now only 7 weeks away.  Yup, you read that correctly, I've signed up for my first ever triathlon.  My sister conquered her first triathlon back in October, which you can read about here.  Since then, she's rocked another one, and will be competing in her third next month.  She is so awesome, and her strength has inspired me to give the tri a try!  

The event will take place right here in this desert town at the university.  In case you're not too familiar with triathlons, the first event is a swim, then biking, then a run.  The distances for my event are 750 meters, 12 miles, and 3 miles, respectively.  Even though I was exhausted from the three day weekend, I still forced myself to get a workout in yesterday.  Here's what I accomplished:

400 yard swim

   Warm-up: Swim easy 50 yards
   Main set: 12x25 yards swim - 15 seconds rest between each
   Cool-down: Swim easy 50 yards

I was able to complete my 12x25 yard swim in under 12 minutes, which gives me a baseline estimate of finishing the 750 meter swim in ~32 minutes.  Even though I'm a bit worrisome on whether I'll be ready in time, I'm still very motivated to get in that pool and work hard.  Here's my tentative training plan for the remainder of the week:
  • Wednesday: Rest
  • Thursday: Run 2.5 miles
  • Friday: Swim 400 yards
       Warm-up: Swim easy 50 yards
       Main set: 6x50 yards swim - 15 seconds rest between each
       Cool-down: Swim easy 50 yards
  • Saturday: Run/Walk with Dogs
  • Sunday: Bike 10 miles


Pin It

Sunday, May 19, 2013

Spring Cleaning....the Fridge

Dusting.....check
Mopping.....check
Donate clothes to Goodwill.....check
Cleaning out the fridge of all those leftover ingredients from winter baking.....CHECK

Spring cleaning always feels so tedious.   Why does the reward have to be just having a fresh and clean house that Mom and Dad would approve of?  Why not reward yourself in the sweetest of ways?  That was my thought today as I put together a list of things to do around the house.  Believe it or not, besides the birthday cobbler, I've been trying not to partake in much baking lately.  This is all thanks to my goal of reducing bad stuff from me and my hunnie's diet...complex carbs, processed sugars.  Let me just say, its been TORTURE!  I decided today that I wanted to clean out the fridge and cupboard of some of those leftover baking ingredients from the holidays, and in an attempt to avoid processed sugars and fats usually in baked goods, I came up with pretty healthy recipe, replacing sugar with local raw honey, replacing bleached flour with whole wheat flour, and replacing butter with coconut oil.  
 
These muffins are full of flavor and the nuts and whole wheat flour make them very filling.  The use of real honey instead of sugar also makes them more moist than you'd expect from a whole wheat muffin.  You may not have all the ingredients lying around the fridge, but they can easily be substituted by something you probably do have tucked away in the pantry.  Don't have apple butter?  Replace with apple sauce...or fresh apples.  You get the idea.  So get to that fridge and start cleaning!

 
Honey Nut Muffins
1 cup whole wheat flour
1/3 cup all purpose flour
1 teaspoon baking soda
1/2 teaspoon cinnamon
1/4 teaspoon nutmeg
1/2 teaspoon salt
1/2 cup coconut oil
1/3 cup honey
2 eggs
1 teaspoon vanilla
1/3 cup milk
1 tablespoon apple butter
1/4 cup pecans, chopped 
1/4 cup walnuts, chopped

Preheat oven to 350 degrees Fahrenheit.  Mix together flour, baking soda, cinnamon, nutmeg and salt.  In another bowl blend together oil, honey, eggs, and vanilla until just combined.  Then stir in milk and apple butter.  Add 1/3 of dry mixture to wet mixture and stir until combined.  Repeat until all dry mixture is combined into wet mixture.  Lastly, fold in nuts (or any other fruit you might have on hand).  Mixture will be somewhat thick.  Scoop into lined cupcake tin and bake for 15 minutes.  Check doneness by sticking a toothpick in the middle--if the toothpick comes out clean, the muffins are done.  Yields ~ 1 dozen.   
Pin It

Tuesday, May 14, 2013

Birthday Blackberry Cobbler

I was dreaming last night of camping.  We were in a campsite along the coast, looking out at the ocean and enjoying something warm and sweet by the campfire.  All of a sudden in the middle of the dream, I hear a beeping noise.  Everyone around the campfire starts looking around, trying to identify the source of the single high pitched beep.  I awoke to realize the battery on our fire alarm had decided to die...at 4:30 AM.  (Why don't those things decide to start beeping at, I dunno, 4 PM instead of at the crack of dawn?!)  On most days, waking up this early would really leave me grumbley, but not today.  It's my hunnie's birthday!  My hunnie...he's an outdoors kind of guy, and one of his favorite camp treats is campfire cobbler, where you throw a can of pie filling and some pancake batter into a foil pouch and cook it right over the flames.  So it was no surprise when I asked him what kind of treat he'd like for his birthday and he said without hesitation "Blackberry Cobbler, baby". 
 
There's a few different ways to make cobbler.  While some spread the cobbler dough at the bottom of the dish and sprinkle fruit on top, others sprinkle fruit on bottom and pour a liquid batter over it.  The way I like to do it combines these two concepts--a thick layer of fruit spread on the bottom of the dish with cobbler dough "plopped" over top in mounds.  It's the way I learn to do it in 8th grade Home Ec, although these days I make the dough from scratch instead of using Bisquick. 
 
This recipe was so easy, I had it in the oven before 6 AM.  The only problem is now I have to wait until after dinner and birthday presents for us to enjoy it!


Blackberry Cobbler
12 oz frozen blackberries, thawed
1 1/2 cups all purpose flour
1 tablespoon baking powder
1/2 teaspoon kosher salt
1/2 cup sugar
Pinch cinnamon
1 teaspoon cornstarch
1/2 lemon, juiced
1/3 cup butter, melted
1/2 cup milk
1 egg
Pinch of cinnamon & sugar for dusting over top

Preheat oven to 350 degrees Fahrenheit.  Use cooking spray or a little softened butter to grease a deep dish pie pan or round casserole dish.  Spread frozen blackberries in single layer on a paper towel and let thaw for 15 minutes.  Sift together flour, baking powder and salt, and set aside.  In another bowl, gently mix together blackberries, sugar, cinnamon, cornstarch and lemon juice.  Spread fruit into the greased cobbler dish.  In a third bowl, whisk together the egg and milk.  Alternate pouring the egg/milk mixture and the melted butter into the flour mixture, until all are combined.  Dough should be a little sticky.  Pat portions of the dough into the shape of a biscuit and "plop" on top of the berries.  Depending on the size of your cobbler dish, space the dough evenly apart.  Sprinkle cinnamon and sugar over top.  Cover with foil and bake for 30 minutes.  Then remove foil and bake for another 6-10 minutes, or until dough is golden on top.
{Me & My Hunnie, the Birthday Boy}
 
Pin It

Friday, May 3, 2013

1 Year Blog-iversary

A little over one year ago I wrote my first blog post...about corn.  Remember that???  Skillet Corn & Black Bean Salad....YUM!  Since then there's been posts on pickles, planetary transits, and puppy dogs.  A few things have happened in one year...my hunnie and I have made a house together, I graduated with a Master of Science in Engineering Management, and my solo running days have been replaced by jogging with our crazy (yet adorable) rescue dogs.  Yet here I am, one year later, writing about...corn!  I guess some things haven't changed.

A few weeks ago, before my week-long travel for work (and bachelorette shenanigans), I paid another visit to Market on the Move, where in addition to some incredible peppers, squash, and organic tomatoes, I scored 8 ears of corn.

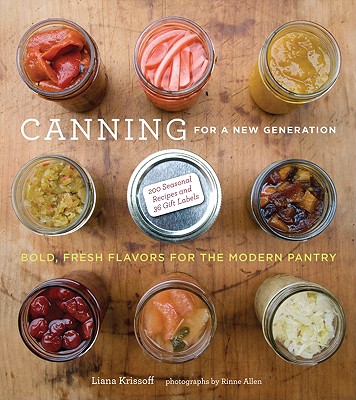
My hunnie is a HUGE corn fan (perhaps a true mid-western boy at heart).  In addition to good ol' fashion corn on the cob paired with sausages or BBQ chicken, he loves it in enchiladas, chili, johnny cakes, and even salsa.  But with so many peppers (and squashes), I knew there was no way we'd get to cooking up all that corn in one week.  Queue in one of my new favorite books, a birthday gift from my big sis: "Canning for a New Generation".
Let me just say, this cookbook is a great beginners guide to preserving local harvests, year-round...freezing, dehydrating, canning...you name it!  It also has some really delightful recipes, and the step-by-step directions and photographs really help when you're canning for the first (or second, or tenth) time.  With so much produce entering our house lately, this cookbook is finally starting to get that pretty little crease right in the binding.  (Oh I can just hear my sis gasping right now....she HATES when I crease book bindings!)

So back to my Blog-iversary....I mean the corn.  

Upon realizing we had more corn than we'd eat right away, I decided I would freeze some of it for later cooking.  A few weeks after freezing, my hunnie and I were enjoying locally grown corn (which even after freezing was still sweet and crispy) in both homemade chili and corn muffins.  

Freezing Corn
6 Ears of Corn (fills approx. 1/2 gallon ziploc bag)

Bring large pot of water to boil.  While water is heating up, shuck corn.  Once water is at a boil, blanch a few ears at a time for 2 minutes.  Then, using tongs, transfer ears of corn to an ice water bath to stop the cooking process.  Repeat for all 6 ears of corn.  Lay ears on a clean towel to air dry for 5-10 minutes.  Use a large, sharp knife to cut the kernels from the cob, and use a cutting board (or in my case, large cookie sheet) to gather all the loose kernels.  Liana Krissoff suggests resting the cob flat, horizontally, on the board and cutting straight down (parallel to the rows of kernels), periodically turning the cob until it is clear of kernels.  I then set the cob vertically, and holding the cob from the top, run the knife downward along the cob to snag any stragglers.  Place the corn in freezer bags, leaving some head space, and use within 1 year.


Pin It