Loving. Learning. Engineering. Life.


Wednesday, November 27, 2013

Happy Thanksgiving & Ancho Chile Pumpkin Pie

This year has been interesting, as I've transitioned from student to professional, twenty-something to adult......girlfriend to future wife.  I am so thankful for the people in my life who have made me the person I am today.  I just re-watched the Charlie Brown Thanksgiving special, and you know what...Peppermint Patty had it all wrong.  Thanksgiving isn't about the turkey or the mashed potatoes.  It's about enjoying the bounty in your life--whether that bounty is family, friends, your successes...etc.  Things may not always be the way you want them, but if you've worked hard, then there is every reason the be happy for what you have.  Now if only I could get Holmesy-dog to whip up a roasted turkey the way Snoopy does.  I really do have so much to be thankful for!
 
I predict a win by My Raiders over the Cowboys tomorrow afternoon, and you can bet I'll be showing up at my hunnie's parents' wearing my silver and black.  I wont, however be showing up with this pie, which I made last weekend.  It was promptly eaten at me and my hunnie's pre-Thanksgiving dinner party, and it was a big hit.  Don't be scared by the idea of chile pepper in a pumpkin pie--the pepper adds a smokiness (not a spiciness) and actually enhances the flavor of the cinnamon and nutmeg. 
 
Happy Thanksgiving and Go Raiders!
    

Ancho Chile Pumpkin Pie
1 homemade pie crust
1 1/2 cup pumpkin
1 cup plain Greek yogurt
1/2 cup heavy whipping cream
3 eggs
1/3 cup packed brown sugar
1/2 cup granulated sugar
1 tablespoon New Mexico (or similar) chile powder
1 heaping teaspoon cinnamon
1/2 teaspoon nutmeg
1/2 teaspoon salt

Preheat oven to 375 degrees Fahrenheit.  Bake homemade pie crust for 8-10 minutes.  In a large bowl, whisk together pumpkin, yogurt, and cream.  Mix in eggs, on at a time until well combined.  Then whisk in brown sugar, granulated sugar, chile powder, cinnamon, nutmeg and salt until smooth.  Remove pie crust from oven and pour in pie filling.  Return to oven and bake approximately 45 minutes, until a knife poked in the center comes out clean.  Serve cold or at room temperature. Pin It

Friday, November 22, 2013

Dutch Oven Pear Cake

I'm back in the desert, back at my the office, and my hunnie and I are falling back into our normal routine.  It feels great to come home after a long days work and cook a nice, mostly Paleo dinner.  It feels even better to have spare time on the weekends again to just catch up and enjoy the company of my hunnie and our two silly, smiley dogs.  Last weekend, I dragged my hunnie to Market on the Move and the local grocery store to stock up the kitchen with fresh veggies and fruit galore.  (I'll admit we also stocked up the liquor cabinet, but hey, that's just us getting ready for the holidays!)  We came home with, among other things, a big basket of pears, which I proceeded to drop on the tile in our kitchen only two days later.  This in turn left us with a kitchen full of fresh veggies, fruit, and bruised pears!  I instantly went into Betty Crocker-mode, and starting skimming through my cookbooks and favorite food blogs to try and figure out what to do with all those bruised pears.  While I could have done Pear Sauce (Applesauce w/ pears) or a Pear Cobbler, I wanted to really challenge myself to get creative, and make something potentially serve-able for the pre-Thanksgiving dinner me and my hunnie are hosting this weekend.  I decided to take an Apple Cider Cake recipe I found, and alter it a bit for the pears.  Did I mention that I don't own a cake pan?  So...I altered the recipe even more by baking the cake in my dutch oven.  While I'm not much for taking risks, boy do I love accomplishing unfathomable feats in the kitchen! 

While this cake is made with wheat flour, the pear puree keeps it moist and light.  This Dutch Oven Pear Cake was great, not only because it was rustic, sweet, and seasonal, but also because it made me feel like the REAL Betty, aceing a new recipe in the kitchen, impressing the friends with a beautiful cake, and winning a kiss from a very impressed hunnie.

Dutch Oven Pear Cake
for the Pears...
4-5 bruised (or perfect) Bartlett Pears, sliced (seeds and stems removed)
1 cup Apple Cider
1/4 cup honey
for the Cake...
1 1/2 cups wheat flour
3 teaspoons baking powder
1 teaspoon baking soda
2 teaspoon cinnamon
1/2 teaspoon ground ginger
1/4 teaspoon ground clove  
7 tablespoons butter + more for greasing the pan
1/2 cup brown sugar
2 eggs

Set oven to 350 degrees Fahrenheit.  Use butter to grease the sides and bottom of the dutch oven (or cake pan).  In a metal pot (no cast iron), bring cider and honey to a simmer.  Add sliced pears and let simmer for 3-4 minutes.  Remove from heat and set aside to cool.  Once pears are cool, scoop out about 8-10 pear slices, and using a fork or potato masher, mash the fruit until it is half chunky/half pureed (think chunky applesauce). 

In a bowl, mix together flour, baking powder, baking soda, cinnamon, ginger and clove.  In another bowl, cream the softened butter and brown sugar.  Add the eggs, one at a time, beating well between each addition.  Then add the chunky pear puree, and mix thoroughly.  Add 1 cup of dry mixture to the wet mixture and stir.  Repeat until all dry ingredients are combined with wet ingredients.  Mixture should be somewhat thick (similar to a quick bread).

Scoop mixture into the center of the dutch oven and use the spoon to spread the batter evenly.  Using a slotted spoon, scoop out the remaining sliced pears, one at a time and distribute over the top of the cake in any pattern you wish.  Bake for 30-35 minutes, or until a toothpick pushed in the center of the cake comes out clean.  Let cake cool before removing from dutch oven.

*It's likely you will have cider left in the pan after using all the pears in the cake.  You can certainly enjoy it as is, or do like we did and warm it up to make an Apple Hot Toddy.

Pin It

Thursday, November 14, 2013

Your Thursday Space Update

Colorado, New York, Colorado, California, Colorado...this is basically what my last month has looked like.  I'm happy to say the travel and long work days have been totally worth while, as my team successfully completed our Engineering Peer Review yesterday.  This is an exciting time for OSIRIS-REx, as we kick off our Critical Design Review season, and in a few weeks, start the 1000 day countdown to launch.  This is also an exciting time for space exploration.  Our sister project, MAVEN, is set to launch next week and begin its journey to Mars, while India's Mars Orbiter Mission is already completing orbit maneuvers around the Earth to build up enough momentum to "launch" itself toward the red planet.  To many people, these space missions seem like a "waste" of taxpayer money, but these missions increase our knowledge about the inner workings of the universe and tell us the story of the creation of our very own solar system.  Not to mention these missions can tell us a lot about our own life on Earth.
 The image you see above was released by NASA back in July.  You are looking at a real image of Saturn, taken by the Cassini-Huygens spacecraft.  This image was created by sewing together thousands of tiny "thumbnail" size pictures taken over a period of 4 hours.  At the point this image was taken, Saturn was positioned right in front of the Sun, while the spacecraft was on the opposite side of the planet.  It's like a lunar eclipse, where the moon is positioned in between the Earth and the Sun, but instead Saturn is positioned in between the Sun and the spacecraft.  The importance of having Saturn backlit by the Sun means that less solar light reached Cassini's cameras and Cassini was able to capture brighter images of Saturn's rings (and otherwise faint stars and planets).  The image on the below right is a scaled-in (zoomed-in) version of the same image you see above.  You see that arrow pointing to a tiny white dot?  That tiny white dot is the Earth & Moon.  Yep, Cassini captured an image of the Earth from a distance of 100 million miles away.  The image on the right is the raw thumbnail image take by Cassini that captured the Earth and the Moon.  Pretty amazing to think what human knowledge can accomplish thanks to the Space industry.  Somewhere on that little gleam of white light you were probably busy cooking dinner, filling your gas tank, or enjoying a glass of wine.  Ever hear the saying a picture tells a thousand words??? 


Images courtesy of:  http://saturn.jpl.nasa.gov  

Pin It

Monday, October 14, 2013

Whole 30 {Week 2 & 3 Recap}

Week 3 of the Whole 30 is over and I'm sure you're wondering if the hunnie and I have given Paleo the boot yet.  We ARE still hangin' on to the Paleo plan...but we are finding out that the American lifestyle is really not built for a complete Whole 30 life. Life can be so busy, and the Whole 30 requires a level of planning that sometimes we just dont have time for.  Not to mention that often time shared with friends and family is around food and drinks...and unless everyone you know is paleo, it can be difficult to say no to non-paleo options even if you wanted to.  (Trust me, there is no way my hunnie and I could've refused Grandma Betty's green corn and cheese tamales and homemade refried beans...she would not have allowed for that). And try ordering a full paleo meal at a restaurant.  Seems like even the salads come with cheese, croutons, candied cranberries or pecans...etc!  It's a little tiring always having to ask to have these food "additives" removed (or replaced with healthier options like steamed greens or tomato slices).  But we've been navigating our way through this challenge and have found a few good/fast options for our busy weekdays.  If you don't mind being THAT pain-in-the-butt customer, most deli's will sell you a sandwich with just the fillings (no bread or rolls), and we found a place in town that will plate up the ingredients of a burrito without the tortilla, cheese or sour cream.  One of my favs is the sugar free Almond milk latte I can pick up from our local coffee shop...its no pumpkin spice latte but its a tasty, healthy alternative.  All in all we are sticking it out as much as possible and trying our best not to sweat the small stuff once in a while if it means a chance to enjoy some laughs with friends or a night off from cooking after a full days work.

{Week 2/3} Breakfasts: Banana Mocha Smoothie, Paleo Cereal, Egg scramble w/ spinach & tomato
{Week 2/3} Lunches: Salad, Sweet potatoes w/ salsa, Salad w/ shredded chicken, Sausage and sauteed peppers and onions
{Week 2/3} Snacks: Raw almonds, Apple chips, unsalted sunflower seeds, olives, sun dried (sulfer-free) tomatoes, & celary w/ a smidgen of peanut butter
{Week 2/3} Dinners: Spaghetti squash w/ itialian sausage marinara, Pulled Pork w/ salsa and guac, Grilled Chicken w/ grilled yellow squash, Steak and zucchini spears, & Spinach & arugula salad w/ chicken
Pin It

Friday, October 11, 2013

Paleo Cereal

Twelve days into the Whole 30, and I'm feeling pretty darn good.  When I was eating gluten and processed sugars, I never noticed feeling bloaty...but now that I've cleansed my body of all that, I am noticing a huge difference.  Not only do I feel like I'm carrying less water weight, I also notice that my skin is just less puffy overall.  And yet, as positive as this experience has been, can I just say, I've missed my complex carbs SO much!  One of the hardest things about this has been saying goodbye to my favorite breakfasts...cereal, oatmeal, toast.  The Paleo diet encourages doing high protein breakfasts, such as egg scrambles or even eating leftover steak and veggies.  But seriously, who wants to eat leftover sauteed okra and turkey sausage for breakfast?!  And hello, who has time to cook up a scramble at 6 AM on a Tuesday?  This is why I sought out a Paleo-approved breakfast that was not only quick, but also satisfied my craving for crunchy, fruity sweetness in the morning.  Paleo Cereal is the best discovery of my Whole 30 experience thus far.  It's fast, flavorful, you can put it together using a variety of your favorite local ingredients, and it gives you that Paleo protein to get started in the morning and keep you moving until lunch.  When you head out to buy the ingredients for this delicious breakfast, head straight for the bulk isle...not only will you save a little money, but you'll probably end up finding local ingredients too.  As a side note, almond milk is pretty good, and I totally recommend it. 
Paleo Cereal
2 cups chopped pecans or walnuts
1/2 cup slivered almonds + 1/4 cup
1/2 cup whole raw almonds
1/2 cup dried cranberries (unsweetened)
1/2 cup raisins
1/2 cup shredded coconut (unsweetened)
1 tablespoon cinnamon
1/4 teaspoon ground allspice 
ground ginger, pinch

Using a food processor, lightly pulse 1/4 cup of slivered almonds (just 2 to 4 pulses is good).  This step isn't really required but I think it gives the cereal a little more texture rather than a bunch of whole nuts.  Combine pulsed almonds with the rest of the nuts and dried fruit.  (Remember, you can use any combination of nuts and fruits you want).  Sprinkle cinnamon, allspice and ginger over nuts/fruits and stir thoroughly to combine.  Store in a quart size mason jar or Tupperware.  Serve 1/2 cup of Paleo Cereal with a heaping pile of your favorite fruits and milk*.  My Paleo milk of choice is Unsweetened Vanilla Almond Breeze.

*To keep it truly Paleo, you should avoid using dairy, but heck, it's cereal...it'll work with just about any type of milk. Pin It

Monday, October 7, 2013

Whole 30 {Week 1} Recap

Week 1 of the Whole 30 is over, and I'd say I did pretty good.  I'll admit, I indulged a little over the weekend on a savory corn flour waffle and a bowl of pinto beans, but believe it or not I've survived a week with NO cheese or dairy of any kind, NO cookies or processed sugars, and almost no gluten (can't forget that most beers have gluten).  My hunnie also did well, though he admitted he snagged a bean and cheese burrito for lunch at work one day....definitely NOT Paleo.  To keep ourselves motivated, we drove out to the desert foothills over the weekend and visited a you-pick farm.  If your not familiar with that term, it means just what you think it means...you go to the farm and pick your own produce right out of the fields.  We snagged up everything from bell peppers, to spaghetti squash, to tomatoes.  Then we went to the apple orchard down the street and picked about 15-20 lbs of fresh apples and pears, right of the trees.  We had so much fun,and having all this fresh, delicious, local produce in the house will be a great motivator for us to stay on track with the Whole 30.   


 {Week 1} Breakfasts: Berry smoothie, Hardboiled egg, Paleo Cereal (recipe here), Green Corn Waffle with Raw Maple Syrup
{Week 1} Lunches: Soup, Tuna Salad with Paleo Pesto Dressing, Salad with a hardboiled egg, more salad, and a Hardboiled egg with fresh snap peas and sautéed apples. 
{Week 1} Snacks: Raw almonds, Bananas, Dried apricots and pears, unsalted sunflower seeds, turkey jerky, California raisins, & a smidgen of peanut butter
{Week 1} Dinners: Elk steaks and okra, Soup, Pizza Salad, Mussels in a saffron broth, Ground turkey marinara sauce over spaghetti squash, Egg and spinach scramble with salsa, & Polish sausage and pinto beans 
Pin It

Saturday, October 5, 2013

Pizza Salad with Paleo Pesto Dressing

I've made it to October 5th.  Woo, one-sixth of the way through the Whole 30.  So far, Monday was the hardest day--the initial shock my body experienced not having grain or dairy.  When I did my 10 mile run on Monday, all I could think about (besides how tired I was) was cheese and bread...which eventually led to me craving pizza.  One day later, I was still craving pizza.  I'll be honest, I don't love pizza just because the zesty tomato sauce and melty mozzarella...I also love how you can pile on all the veggies you want.  That must have been why California schools used to consider pizza as a member of the Vegetable group on the food pyramid.  (Oh California, how I miss you...)  Anyways, to curb the pizza craving, I made what I'm calling Pizza Salad.  The recipe, including the pesto dressing, is totally Paleo, and ended up being amazingly delicious, even without any grain (croutons) or dairy (blue cheese).  I got lots of "Mmms" and "Yums" from the hunnie too.  I think I'll keep the pesto dressing up my sleeve for even after the Whole 30 ends.
 

Paleo Pesto Dressing
1 cup basil leaves
2 cloves garlic
Slivered almonds, handful (not heeping)
3 tablespoons extra virgin olive oil
3-4 tablespoons balsamic vinegar
Salt, dash
Crushed red pepper flakes, dash
Blend basil, garlic, almonds and oil in blender or food processor until smooth.  Add balsamic vinegar and spices and pulse.  If dressing is too thick add a tablespoon or two of water to the blender, and blend until desired consistency.  Makes ~4oz.

Pizza Salad
Toss together your favorite veggies, either salad veggies or pizza veggies, and drizzle the Paleo Pesto dressing over top.  Here is what our salad was made up of:  baby spinach, sliced mushrooms, vine ripe cherry tomatoes, sliced green bell pepper, sliced cucumber, kalamata olives, pepperoncinis, and sliced pepperoni.
 
Pin It

Tuesday, October 1, 2013

October is...Whole 30, Half Marathon & Halloween!


October is an exciting, and busy time for me.  I've got three planned business trips in addition to a half marathon.  I'm excited to say that this October my hunnie and I are also doing the Whole 30.  You can read about Whole 30 here.


TheThe idea behind the Whole 30 is the "Paleo" or "Caveman" diet.  The science is long, but not really complicated--cavemen ate food purely for survival--they ate sugars for energy, fats for energy storage, and salts for hydration.  There was no such thing as a enjoying a s'more around the caveman campfire.  On the Whole 30 plan, you strip your diet completely of the complex foods that make up your daily sugar, fat and salt intake, and instead partake in a more wholesome, natural diet (free of beloved complex carbs, gluten, dairy and processed sugars).  While I can't say I 100% agree with ALL the science behind the Paleo diet, I do think eating processed foods (like my very favorite Mac n' Cheese, or Eggo waffles) makes the human body work incredibly hard just to obtain the BASIC nutrients it actually needs to SURVIVE.  The challenge for me with the Whole 30 is to find alternatives to meals such as Mac n' Cheese, which are full of empty calories and low in essential nutrients.  The challenge is to go back to basics--meats, vegetables, fruits--the cornerstone of early human nutrition.  Since I'm training for my half marathon, that gives me a little freedom to enjoy more carbs per day, but instead of enjoying them in the form of pasta and PB&J sannys, I'll have to find gluten-free, minimally processed foods to meet the bill.   

Today marks the first day of the challenge, but me and my hunnie were so eager to start that we unofficially began on Sunday night.  Here's a glance at what we ate for dinner: grilled elk tenderloin with braised okra and onions.  Meat and veggies, done simply, and yet really delicious.  Amazingly I was even able to motivate myself to get out and run last night--despite my legs feeling like lead and my thoughts centered on pizza and cheese, I was able to successfully complete my full 10 mile run.  Usually, I'd reward such a great run by eating a piece of cheese or a cookie, but last night I stuck to my plan and rewarded myself with a slice of salami and some nuts instead (it was totally not as satisfying as a cookie, but oh well, its only 30 days!).  

In case you need some motivation to accomplish your October goals, whatever they may be, here ya' go:

http://media-cache-ec0.pinimg.com/originals/a8/d3/85/a8d385f185d6f42bd80ead5a92f97ae8.jpg


Pin It

Tuesday, September 10, 2013

Pre-Fall Kick-off

It's not quite the Fall equinox yet, but its been a cloudy, balmy 85 degrees here....and in the Ol' Pueblo that's downright Fall temperatures.  Fall may mean the end of Summer and back to school, but it also means football's back, hunting season is here, and the kitchen is full of Summer produce waiting to be gobbled up.  I recently acquired a Kabocha squash, the lesser known Japanese cousin to the acorn squash.  Don't ask how I ended up with a Winter squash in the middle of the desert Summer...that is a mystery I can't yet explain.  This Kabocha was big (about the size of my head) so I figured the easiest, most versatile way to prepare it was simply to cut it in half, roast it, and puree it down for later use.  The first bit of puree turned into a rustic, cheesy sauce for pasta and turkey sausage.  That was a perfect Summer-time recipe, but I was still wishing for something a little more earthy, more Autumnal.  Thus came this recipe--I simply took a pumpkin bread recipe, replaced the pumpkin with its Asian counterpart, and voila...delicious, wholesome Kabocha bread to enjoy over a cup of coffee and a 10 AM kick off time.  This really is my favorite season of all.
 

Kabocha Bread
1 cup Kabocha (or acorn or butternut or pumpkin) puree
2 eggs
1/4 cup coconut oil
1/4 cup water
1 cup white sugar
1 3/4 cups whole wheat flour
1 teaspoons baking soda
1/2 teaspoon kosher salt
2 teaspoons ground cinnamon
1/2 teaspoon ground nutmeg

1/4 teaspoon allspice
1/4 cup pecan pieces (optional)

Grease a 8x4x3 inch loaf pan.  In a bowl mix together Kabocha puree, eggs, oil, water and sugar.  In another bowl, mix together flour, baking soda, cinnamon, nutmeg, and allspice.  Add 1/2 cup at a time of dry ingredients to wet ingredients and stir until just combined.  Repeat until all dry ingredients are combined with wet ingredients.  Lastly stir in pecan pieces.  Pour mixture into loaf pan.  Bake at 350 degrees Fahrenheit for 50-55 minutes.  To ensure the bread is cooked through, stab a wooden skewer through the middle of the loaf--if the skewer comes out clean, the bread is done.

Pin It

Wednesday, August 14, 2013

Chocolate Chip Cherry Cookies

It's Wednesday, and to be honest I don't have much to share.  Work is work, the dogs are silly, and it's darn hot out here in the desert.  Summers in California were hot, but not as hot as here.  In fact, I remember some California Summer days, where the sea breeze would reach us all the way in the valley and the mornings would be downright cold.  It was on those Summer days, as teenagers, that my sister and I, still in pajamas, neglecting Mom's chore list, would decide to heat up the kitchen and bake some chocolate chip cookies.  She measured and mixed, while I talked and washed the dishes (I wasn't such a good cook in those days).  And by lunchtime we would have eaten a few too many cookies and done a few too few chores.  Those days were the best!

Last Saturday morning I paid homage to that memory, by baking some cookies (and neglecting some chores).  These are a little different from the standard Nestle Tollhouse ones my sis and I would make, but they were almost as tasty, especially with the surprise burst of flavor from the dried cherries.  Since I'm the sole cookie consumer in the house, I mixed up a full batch of this recipe, but then stored half of the raw dough in the freezer for another Saturday morning.

Chocolate Chip Cherry Cookies
2/3 cup bleached flour
1 1/3 cup whole wheat flour
1/2 teaspoon salt
1/2 teaspoon baking soda
12 tablespoons unsalted butter, melted
2/3 cup brown sugar
1/3 cup sugar
1 egg
1 tablespoon plain yogurt
2 teaspoons vanilla
1 scant cup semi-sweet (or white chocolate) chips
1 scant cup dried tart cherries

Set oven to 325 degrees Fahrenheit.  Sift together flour, whole wheat flour, salt and baking soda.  In another bowl, mix together butter, brown sugar and sugar until well blended.  Then stir in egg, yogurt, and vanilla.  Combine dry ingredients, one cup at a time, into the wet mixture.  Repeat until all dry ingredients have been combined.  Then, using a fork, gently mix in the chocolate chips and cherries.  Using a tablespoon, scoop dough onto a cookie sheet.  Bake for 10-12 minutes, until edges are slightly golden. Pin It

Saturday, August 10, 2013

The Adventures of Georgia Dog

A few weeks ago, my hunnie and I finally made it out for a real weekend getaway to Durango ,Colorado.  We met up with friends from New Mexico, Colorado, and Northern Arizona.

Georgia came along. 

 
Holmes was there too. 

One morning, we packed up our lunches and off we went (dogs in tow) for a hike along the creek.
 
Long story short, don't let your hound dog off his leash, because he almost certainly will bolt, off into the wild, following his nose the whole way.  Another long story short, scared-y dogs like Georgia will almost certainly hide if they're being chased.  Give them an inch, they'll take a mile.  
 
After two days, I was starting to think I'd never see Georgia, my princess-dog, ever again.  But in the end, Georgia is a smart dog, and she really does love us.  I know this because she sniffed her way back to camp, at night, in the rain, and willingly approached our friends who'd offered to stay an extra night at the campsite.  Oh thank you, Universe (and Bethany and Andrew)!

It took a week, 900 miles, and the help of so many great friends, but Georgia made it back to the ol' Pueblo.  And when she got home, all she wanted to do was take a nap and dream about her adventures in Durango.

Pin It

Thursday, July 25, 2013

South x Southwest Tomato Pie

Unlike my own tomato plants, which have plenty of buds and no fruit, I was welcomed at last weekend's Market on the Move by many delicious tomatoes.  Big ones, small ones, organic ones.  Now, even in this desert town one can get tired of making homemade salsa (and tomato sauce) every week, so as I walked through the MoM line selecting all those little bright red gems, my brain was spinning trying to figure out how I was going to use them all.  I turned to one of my favorite food bloggers, a Southern gal embracing Texas-style comfort food.  It's been over a year since I first read Homesick Texan's recipe for tomato pie ...and last weekend I finally had the opportunity and ingredients to try it for myself.

The recipe I came up with is more South-by-Southwest, thanks largely to the incorporation of Hatch green chilies.  It goes great alongside BBQ chicken or even on its own with a salad.  Best part is, it's probably the most delicious way to use up all those tomatoes you've worked so hard to grow (or buy from the Farmer's market).  I have to admit that my photo does NOT do the South x Southwest tomato pie justice...it really will become one of your go-to Summer recipes.  


South x Southwest Tomato Pie
8-10 Roma Tomatoes
10-12 Cherry Tomatoes
1/3 Yellow Onion, diced
1/2 cup roasted green chilies, diced (or 1/2 can diced green chilies)
4 slices bacon
1 teaspoon kosher salt
1 refrigerated pie crust
2 cups shredded cheese (I used a mix of jack & cheddar cheese)

Slice Roma tomatoes and halve cherry tomatoes. Place in colander and toss with kosher salt.  Let  tomatoes sit for approximately 30 minutes to drain/evaporate some of the moisture.  Meanwhile, cook bacon, let drain on a paper towel, and chop into bacon bits.  Saute diced onion (and don't be ashamed if you used a drop or two of the bacon grease for sauteing).  Lightly coat pie pan with cooking spray.  Roll out pie crust and place in pie pan.  Sprinkle a handful of cheese on the bottom of the pie crust.  Then layer the tomatoes, chilies, onion and bacon in the pan.  Repeat until pan is full.  Sprinkle remaining cheese over the top of the pie.  Place pie pan on a cookie sheet and bake at 350 degrees Fahrenheit approximately 35 minutes (or until pie crust is golden). 

Pin It

Friday, July 19, 2013

Friday, Friday

Not to worry, I haven't been recruited to do the next spacewalk on the ISS.  Just busy with life.  But hey, it's Friday!  One of my favorite things about Friday...no work Saturday.  One of my other favorite things about Friday is Friday night...because I get to spend it with this guy...


And these guys...


But mostly I'm excited to hang with this guy...my fiancé.
Hope ya'll are enjoying your Summer!  Happy Friday!
Pin It

Thursday, July 4, 2013

My Favorite Day

Today is my favorite day of the year.  That's right....it's not Christmas, it's not my birthday.  It's the 4th of July.  A day not only to celebrate America's independence, but to celebrate everything that this country stands for and everything that being an American means.  While times have been tough for awhile now, I still believe this country to be the greatest land of opportunity.  With motivation, hard work, and a strong moral compass, I believe that every American can succeed and find happiness. 
I love this country for so many reasons.  My dad and his family emigrated from Fiji in the 70's, and instead of getting turned away at the gates in San Francisco for being different, they were welcomed.  Diversity is the single most significant reason that America has been a success, and why it has remained strong for over two hundred years.  Diversity in land, diversity in people, and diversity in thought.  
This country was not built on the back of one man.  Rather, the foundation was laid by all men and women, from those who were willing to fight, to those who were willing to take a risk, and those who were willing to take a stand.  America gives us the freedom of speech, freedom to learn, and freedom to love who we want to love.  We must never forget that freedom is not free.  It is our duty as Americans to not only remember those who have dedicated and sacrificed their lives for our freedoms, but also to dedicate our own lives to continuing that fight for future generations. 
When you see the flag flying today, and you hear the national anthem, please take a moment to reflect on what being an American means to you.  It's okay if your beliefs are different than mine, that's what America is all about.  Happy 4th of July!


Pin It

Sunday, June 2, 2013

Here Comes The Heat

It's June, which in the eyes of every kid (including myself), means it's Summer!  As a woman in the sciences, I realize that Summer doesn't officially start until the solstice, when the Earth's tilt puts the Northern Hemisphere closest to the sun (hence June 21st being the longest day of the year for us Americans).  But seriously, we just hit 100 degrees here in the desert, so kiddies go ahead and continue cheering "Yay, Summer!"...I won't argue. 
Anyways....yesterday, in usual Saturday fashion, I was up early and at the Market on the Move here in town.  I came home with many goodies, including watermelon, cantaloupe, squash and a bunch of green chilies.  Since my hunnie and I were attending a BBQ at the air base in the evening, I decided I'd whip together a real treat to welcome the new squad chief.  (Admittedly I wanted to make sure my hunnie would get noticed by the chief, not only for his accomplishments at work, but also for the truly Southwestern fare his *lovely, charming, smart* girlfriend brought.  Hey, No Judging!) 
Now this recipe, it's not for the faint of heart.  Not only does it bring the heat to your taste buds, but these darn things took forever to assemble, even using canned chunk chicken!  (Again, No Judging) In the end, the amount of time to assemble was well worth it.  They were a true hit...and gobbled up within minutes of coming off the grill.  The new chief even came over to my hunnie to tell him he's invited to every Hi-and-Bye-BQ for the foreseeable future...as long as he brings me (and my food) of course!    

Cheesy Stuffed Green Chilies
12-14 green chilies
3-4 tomatos, diced
4 green onions, chopped
12 oz can chopped chicken, drained
10 oz queso fresca, chopped into small cubes
10 oz cream cheese, softened
1 cup shredded cheese

Bring a large pot of water to boil and add the chilies.  Let boil for 4 minutes, then remove them from the pot and let them drain & cool on a cookie sheet.  (This step is not required, but boiling the peppers will make them easier to work with when deseeding and stuffing).  While chilies are cooling, mix together tomatoes, green onions, chicken, queso fresca, cream cheese, and shredded cheese. 
Once chilies are cooled,  carefully make a slit from the bottom of the pepper to the top and deseed.  (I used a paring knife to cut seeds and membranes out, and then used water to wash away remaining seeds).  Use a small spoon to stuff each chili with the chicken/cheese mixture.  Grill, cheese side up (or bake at 375 degrees Fahrenheit) until chilies are roasted and cheese is simmering.


If your fingers are burning after deseeding the chilies, the remedy I suggest is a 5 minute soak in milk.
Pin It

Wednesday, May 29, 2013

Rounding Out May -- My 1st Triathlon

Memorial Day has come and gone, my brief but fun vacation to California is behind me, and the only thing staring me in the face now is my first triathlon, which is now only 7 weeks away.  Yup, you read that correctly, I've signed up for my first ever triathlon.  My sister conquered her first triathlon back in October, which you can read about here.  Since then, she's rocked another one, and will be competing in her third next month.  She is so awesome, and her strength has inspired me to give the tri a try!  

The event will take place right here in this desert town at the university.  In case you're not too familiar with triathlons, the first event is a swim, then biking, then a run.  The distances for my event are 750 meters, 12 miles, and 3 miles, respectively.  Even though I was exhausted from the three day weekend, I still forced myself to get a workout in yesterday.  Here's what I accomplished:

400 yard swim

   Warm-up: Swim easy 50 yards
   Main set: 12x25 yards swim - 15 seconds rest between each
   Cool-down: Swim easy 50 yards

I was able to complete my 12x25 yard swim in under 12 minutes, which gives me a baseline estimate of finishing the 750 meter swim in ~32 minutes.  Even though I'm a bit worrisome on whether I'll be ready in time, I'm still very motivated to get in that pool and work hard.  Here's my tentative training plan for the remainder of the week:
  • Wednesday: Rest
  • Thursday: Run 2.5 miles
  • Friday: Swim 400 yards
       Warm-up: Swim easy 50 yards
       Main set: 6x50 yards swim - 15 seconds rest between each
       Cool-down: Swim easy 50 yards
  • Saturday: Run/Walk with Dogs
  • Sunday: Bike 10 miles


Pin It

Sunday, May 19, 2013

Spring Cleaning....the Fridge

Dusting.....check
Mopping.....check
Donate clothes to Goodwill.....check
Cleaning out the fridge of all those leftover ingredients from winter baking.....CHECK

Spring cleaning always feels so tedious.   Why does the reward have to be just having a fresh and clean house that Mom and Dad would approve of?  Why not reward yourself in the sweetest of ways?  That was my thought today as I put together a list of things to do around the house.  Believe it or not, besides the birthday cobbler, I've been trying not to partake in much baking lately.  This is all thanks to my goal of reducing bad stuff from me and my hunnie's diet...complex carbs, processed sugars.  Let me just say, its been TORTURE!  I decided today that I wanted to clean out the fridge and cupboard of some of those leftover baking ingredients from the holidays, and in an attempt to avoid processed sugars and fats usually in baked goods, I came up with pretty healthy recipe, replacing sugar with local raw honey, replacing bleached flour with whole wheat flour, and replacing butter with coconut oil.  
 
These muffins are full of flavor and the nuts and whole wheat flour make them very filling.  The use of real honey instead of sugar also makes them more moist than you'd expect from a whole wheat muffin.  You may not have all the ingredients lying around the fridge, but they can easily be substituted by something you probably do have tucked away in the pantry.  Don't have apple butter?  Replace with apple sauce...or fresh apples.  You get the idea.  So get to that fridge and start cleaning!

 
Honey Nut Muffins
1 cup whole wheat flour
1/3 cup all purpose flour
1 teaspoon baking soda
1/2 teaspoon cinnamon
1/4 teaspoon nutmeg
1/2 teaspoon salt
1/2 cup coconut oil
1/3 cup honey
2 eggs
1 teaspoon vanilla
1/3 cup milk
1 tablespoon apple butter
1/4 cup pecans, chopped 
1/4 cup walnuts, chopped

Preheat oven to 350 degrees Fahrenheit.  Mix together flour, baking soda, cinnamon, nutmeg and salt.  In another bowl blend together oil, honey, eggs, and vanilla until just combined.  Then stir in milk and apple butter.  Add 1/3 of dry mixture to wet mixture and stir until combined.  Repeat until all dry mixture is combined into wet mixture.  Lastly, fold in nuts (or any other fruit you might have on hand).  Mixture will be somewhat thick.  Scoop into lined cupcake tin and bake for 15 minutes.  Check doneness by sticking a toothpick in the middle--if the toothpick comes out clean, the muffins are done.  Yields ~ 1 dozen.   
Pin It

Tuesday, May 14, 2013

Birthday Blackberry Cobbler

I was dreaming last night of camping.  We were in a campsite along the coast, looking out at the ocean and enjoying something warm and sweet by the campfire.  All of a sudden in the middle of the dream, I hear a beeping noise.  Everyone around the campfire starts looking around, trying to identify the source of the single high pitched beep.  I awoke to realize the battery on our fire alarm had decided to die...at 4:30 AM.  (Why don't those things decide to start beeping at, I dunno, 4 PM instead of at the crack of dawn?!)  On most days, waking up this early would really leave me grumbley, but not today.  It's my hunnie's birthday!  My hunnie...he's an outdoors kind of guy, and one of his favorite camp treats is campfire cobbler, where you throw a can of pie filling and some pancake batter into a foil pouch and cook it right over the flames.  So it was no surprise when I asked him what kind of treat he'd like for his birthday and he said without hesitation "Blackberry Cobbler, baby". 
 
There's a few different ways to make cobbler.  While some spread the cobbler dough at the bottom of the dish and sprinkle fruit on top, others sprinkle fruit on bottom and pour a liquid batter over it.  The way I like to do it combines these two concepts--a thick layer of fruit spread on the bottom of the dish with cobbler dough "plopped" over top in mounds.  It's the way I learn to do it in 8th grade Home Ec, although these days I make the dough from scratch instead of using Bisquick. 
 
This recipe was so easy, I had it in the oven before 6 AM.  The only problem is now I have to wait until after dinner and birthday presents for us to enjoy it!


Blackberry Cobbler
12 oz frozen blackberries, thawed
1 1/2 cups all purpose flour
1 tablespoon baking powder
1/2 teaspoon kosher salt
1/2 cup sugar
Pinch cinnamon
1 teaspoon cornstarch
1/2 lemon, juiced
1/3 cup butter, melted
1/2 cup milk
1 egg
Pinch of cinnamon & sugar for dusting over top

Preheat oven to 350 degrees Fahrenheit.  Use cooking spray or a little softened butter to grease a deep dish pie pan or round casserole dish.  Spread frozen blackberries in single layer on a paper towel and let thaw for 15 minutes.  Sift together flour, baking powder and salt, and set aside.  In another bowl, gently mix together blackberries, sugar, cinnamon, cornstarch and lemon juice.  Spread fruit into the greased cobbler dish.  In a third bowl, whisk together the egg and milk.  Alternate pouring the egg/milk mixture and the melted butter into the flour mixture, until all are combined.  Dough should be a little sticky.  Pat portions of the dough into the shape of a biscuit and "plop" on top of the berries.  Depending on the size of your cobbler dish, space the dough evenly apart.  Sprinkle cinnamon and sugar over top.  Cover with foil and bake for 30 minutes.  Then remove foil and bake for another 6-10 minutes, or until dough is golden on top.
{Me & My Hunnie, the Birthday Boy}
 
Pin It

Friday, May 3, 2013

1 Year Blog-iversary

A little over one year ago I wrote my first blog post...about corn.  Remember that???  Skillet Corn & Black Bean Salad....YUM!  Since then there's been posts on pickles, planetary transits, and puppy dogs.  A few things have happened in one year...my hunnie and I have made a house together, I graduated with a Master of Science in Engineering Management, and my solo running days have been replaced by jogging with our crazy (yet adorable) rescue dogs.  Yet here I am, one year later, writing about...corn!  I guess some things haven't changed.

A few weeks ago, before my week-long travel for work (and bachelorette shenanigans), I paid another visit to Market on the Move, where in addition to some incredible peppers, squash, and organic tomatoes, I scored 8 ears of corn.

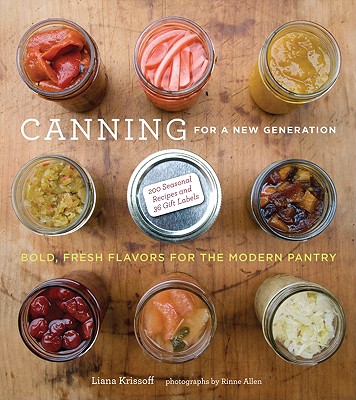
My hunnie is a HUGE corn fan (perhaps a true mid-western boy at heart).  In addition to good ol' fashion corn on the cob paired with sausages or BBQ chicken, he loves it in enchiladas, chili, johnny cakes, and even salsa.  But with so many peppers (and squashes), I knew there was no way we'd get to cooking up all that corn in one week.  Queue in one of my new favorite books, a birthday gift from my big sis: "Canning for a New Generation".
Let me just say, this cookbook is a great beginners guide to preserving local harvests, year-round...freezing, dehydrating, canning...you name it!  It also has some really delightful recipes, and the step-by-step directions and photographs really help when you're canning for the first (or second, or tenth) time.  With so much produce entering our house lately, this cookbook is finally starting to get that pretty little crease right in the binding.  (Oh I can just hear my sis gasping right now....she HATES when I crease book bindings!)

So back to my Blog-iversary....I mean the corn.  

Upon realizing we had more corn than we'd eat right away, I decided I would freeze some of it for later cooking.  A few weeks after freezing, my hunnie and I were enjoying locally grown corn (which even after freezing was still sweet and crispy) in both homemade chili and corn muffins.  

Freezing Corn
6 Ears of Corn (fills approx. 1/2 gallon ziploc bag)

Bring large pot of water to boil.  While water is heating up, shuck corn.  Once water is at a boil, blanch a few ears at a time for 2 minutes.  Then, using tongs, transfer ears of corn to an ice water bath to stop the cooking process.  Repeat for all 6 ears of corn.  Lay ears on a clean towel to air dry for 5-10 minutes.  Use a large, sharp knife to cut the kernels from the cob, and use a cutting board (or in my case, large cookie sheet) to gather all the loose kernels.  Liana Krissoff suggests resting the cob flat, horizontally, on the board and cutting straight down (parallel to the rows of kernels), periodically turning the cob until it is clear of kernels.  I then set the cob vertically, and holding the cob from the top, run the knife downward along the cob to snag any stragglers.  Place the corn in freezer bags, leaving some head space, and use within 1 year.


Pin It