Loving. Learning. Engineering. Life.


Showing posts with label How-to. Show all posts

Tuesday, January 28, 2014

Quick Tuesday Cures

Are you suffering from a cold right now?  Or, do you just have a case of the Mondays that's SO bad, it has turned into a case of the Tuesdays?  Well I've been battling congestion all week and let me just tell you, I did not want to get out of bed this morning.  Alas, I'm a grown up now, which means going into the office, even when you have the sneezy, stuffy head, don't-wanna-do-anything kind of morning.  So here's some recommendations that may work for you, that worked to motivate me today:  1) wore a very comfy t-shirt to work, 2) consumed massive amounts of Breath Easy tea….which is amazing by the way, and 3) put on some awesome red lipstick.  If anything can make you feel better on those no good, very stuffed up days, it's the lipstick.  I guess Sarah Palin had something right.


Have a great day!

Pin It

Friday, May 3, 2013

1 Year Blog-iversary

A little over one year ago I wrote my first blog post...about corn.  Remember that???  Skillet Corn & Black Bean Salad....YUM!  Since then there's been posts on pickles, planetary transits, and puppy dogs.  A few things have happened in one year...my hunnie and I have made a house together, I graduated with a Master of Science in Engineering Management, and my solo running days have been replaced by jogging with our crazy (yet adorable) rescue dogs.  Yet here I am, one year later, writing about...corn!  I guess some things haven't changed.

A few weeks ago, before my week-long travel for work (and bachelorette shenanigans), I paid another visit to Market on the Move, where in addition to some incredible peppers, squash, and organic tomatoes, I scored 8 ears of corn.

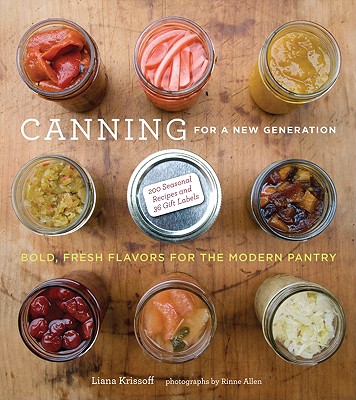
My hunnie is a HUGE corn fan (perhaps a true mid-western boy at heart).  In addition to good ol' fashion corn on the cob paired with sausages or BBQ chicken, he loves it in enchiladas, chili, johnny cakes, and even salsa.  But with so many peppers (and squashes), I knew there was no way we'd get to cooking up all that corn in one week.  Queue in one of my new favorite books, a birthday gift from my big sis: "Canning for a New Generation".
Let me just say, this cookbook is a great beginners guide to preserving local harvests, year-round...freezing, dehydrating, canning...you name it!  It also has some really delightful recipes, and the step-by-step directions and photographs really help when you're canning for the first (or second, or tenth) time.  With so much produce entering our house lately, this cookbook is finally starting to get that pretty little crease right in the binding.  (Oh I can just hear my sis gasping right now....she HATES when I crease book bindings!)

So back to my Blog-iversary....I mean the corn.  

Upon realizing we had more corn than we'd eat right away, I decided I would freeze some of it for later cooking.  A few weeks after freezing, my hunnie and I were enjoying locally grown corn (which even after freezing was still sweet and crispy) in both homemade chili and corn muffins.  

Freezing Corn
6 Ears of Corn (fills approx. 1/2 gallon ziploc bag)

Bring large pot of water to boil.  While water is heating up, shuck corn.  Once water is at a boil, blanch a few ears at a time for 2 minutes.  Then, using tongs, transfer ears of corn to an ice water bath to stop the cooking process.  Repeat for all 6 ears of corn.  Lay ears on a clean towel to air dry for 5-10 minutes.  Use a large, sharp knife to cut the kernels from the cob, and use a cutting board (or in my case, large cookie sheet) to gather all the loose kernels.  Liana Krissoff suggests resting the cob flat, horizontally, on the board and cutting straight down (parallel to the rows of kernels), periodically turning the cob until it is clear of kernels.  I then set the cob vertically, and holding the cob from the top, run the knife downward along the cob to snag any stragglers.  Place the corn in freezer bags, leaving some head space, and use within 1 year.


Pin It

Saturday, April 6, 2013

Market on the Move & Oven-to-Freezer Tomato Sauce

A couple weeks back I was on my way to the salon to visit my favorite esthetician when I noticed a busy farmer's market taking place at the nearby Baptist church.  Now imagine the amount of people at a Baptist church on Easter Sunday...and multiply that by 2; that was the number of people at this farmer's market.  The place was hoppin'.  But unlike a farmers market, this event had lines of people, all waiting to get their chance to walk from one tent to the next to get their veggies; and when they did get through the row of tents, folks were carrying away literal boxes of fruits and veggies.  I was intrigued, but quickly forgot all about it an hour later when I was pulling out of the salon parking lot.  It wasn't until I happened to read the newspaper yesterday that I came across a posting of addresses for the next "Market on the Move".  One click led to the next and I was on a non-profit website reading all about a weekly event that travels to parking lots all over town.  Turns out the Baptist church was hosting a M.o.t.M. event that Saturday, and the line wrapped around the building because a $10 donation got patrons up to 60 pounds of veggies and fruits!  How can they offer it so cheaply?  Well most of the veggies are perfectly good, but after inspection at sorting facilities, they've been set aside because of visual appearance (awkwardly shaped, variation in color, too big, too small...etc).  Some of the veggies are what would be considered "last chance" produce--they're so ripe that grocery stores can't put them on the shelves and get them sold fast enough.  Market on the Move's solution brings produce to local Arizona communities at a fraction of grocery store prices, and in the process prevents actual tons of perfectly good food from spoiling and going into landfills.  Not to mention, acquiring so much produce means you can pass on the freshness to friends, family, and those in need. 
Long story short, this is a fantastic program.  I was so excited upon reading about it that I was up and out the door bright and early today, eager to experience my first Market on the Move event.  Here's what my $10 donation got me and my hunnie:
  • 1 large spaghetti squash
  • 12 zuccini squash
  • 18 cucumbers
  • 8 green bell peppers
  • 9 pasillo peppers
  • 23 roma tomatos
This didn't even amount to the 60 pound maximum, but I didn't want to get greedy.  I did some rough calculations and this would have cost me about $20 at the local grocery store.  Upon coming home, I split up my goodies into a pile to be rinsed and refrigerated and a pile to be preserved.  Not feeling confident enough to can tomatoes (urgh...botulism), I decided to go the freezer route.  I adapted this recipe from Foodperson.com for tomato sauce that you goes from oven to freezer (so you can avoid the canning process altogether).   Now I am anxiously awaiting the chance to make pasta for my hunnie...he humors me enough to get almost as excited as I do about fresh, local, and truly homemade food.


Oven-to-Freezer Tomato Sauce

11 large roma tomatoes (yields about 5 cups of tomato sauce)
1 medium red onion
6-8 garlic cloves
Salt
Ground black pepper
Olive oil
Set oven to 350 degrees fahrenheit.  Wash and trim tomatoes of anything you wouldn’t want to eat, such as stem or scars. Cut tomato in half and then into fourths (thirds for smaller tomatoes). Lay out tomatoes in large pans with a 1" lip. Tomatoes don’t have to be in a single layer, but don’t mound above the height of the pan’s lip.  Peel garlic cloves, cut onion into large cubes, and sprinkle over tomatos. Generously sprinkle tomatoes with salt and pepper, and drizzle with olive oil.  Roast about 2 hours, or until the tomatoes have cooked down*. 

Let cool, then puree tomato mixture with blender or food processor.  Transfer to freezer bags, lie them flat (for better storage) in the freezer, and when you're ready for homemade tomato sauce, let the bag defrost and then reheat in a saucepan.


*I slightly overcooked mine so the veggies would have a little char to them Pin It

Thursday, August 30, 2012

Colorado Morning

I woke up feeling chilly this morning.  I know this must sound strange, and rest assured it's not Fall yet in the desert.  Actually, the reason I awoke wishing I was wearing socks and drinking a hot coffee is because I'm in the Mile-High City for my first business trip.  I was feeling a little nervous, but after days of reading and prepping, and a morning run through the Colorado foothills, I feel ready for my all-day meeting at Lockheed Martin.  As I've mentioned before, I'm a planner (recall the plan for our move).  So it should be no surprise that I put together a list of tips and tricks that I followed to make this first business trip a success.
  1.  To get through the airport as quickly and efficiently as possible:
    • Do carry-on only.  It saves time, there is no worry of "what if they lost my bag", and you wont have to pay extra fees.
    • Embrace the hotel samples (I'm a bit of a toothpaste snob and hotels sometimes don't provide it, so I brought my own, IN A QUART-SIZE BAG, OF COURSE).
    • Print out your boarding passes and do online check-in when available.
  2. To look your best at the jobsite:
    • Bring a business outfit that won't tend to wrinkle.   
    • Make sure your outfit meets the occassion of the business trip, but also pick something you are comfortable in.  (As an engineer in a male industry, I try to put a feminine flair on mensware--nice fitting slacks and a shirt that lets me roll up my sleeves and get down to business)
    • Bring comfortable shoes (My slacks required some height so I wore a pair of 1 1/2 inch heels)
  3. To impress your hosts at the jobsite:
    • Come prepared.  Read up on the topics of the meeting (take notes and write down questions ahead of time).
    • Smile and shake hands when you introduce yourself to everyone, no matter if its the big boss or the intern.  (This is my dad's #1 tip, and I bet it'd be your dad's #1 tip too)
    • Have an interesting, unrelated topic "on file" for lunch discussion.  (I read The Ten Faces of Innovation during the flight--it's one of my homework reads.  I figure that'll be a good conversation starter.) 
  4. If you plan to exercise on the trip:
    • Wear one or more of your workout items (clean, of course) on the plane to your business destination.  This will lighten your load.  (I wore my running tennys on the flight to Colorado)
    • Plot out your running destination ahead of time and make sure you give yourself ample time for exercise, shower, and breakfast if you plan to do your workout the morning of the meeting
  5. Don't forget essentials like your ID, cash, phone/computer charger, AND the contact information for someone at the business you are visiting (in case you get sick or lost).
Sounds like I haven't escaped the heat for too long...it's going to be in the 90's in the Mile-High City today.  Then it's back to the desert tonight. 

Pin It

Saturday, July 14, 2012

Spicy Dill Pickle Medallions

About a week before the move, my hunnie and I scored an insane deal on cucumbers at the local Mexican market: 9 for 99 cents.  Having a hunnie that loves pickles and all things salty, it didn't take much coaxing to convince me it was time to take the plunge and make my own pickles.  I'd been mulling over the idea for a while, and after several pickling discussions with our friends (and some tips from a few blogs) I had a pretty clear idea on how to make them.  So in the midst of packing that afternoon, my hunnie unexpectedly became my assistant in the pickling endeavor in the tiny kitchen of our 3rd floor apartment.  Three weeks later, my hunnie's closest friends were in town from "up North", giving us the appropriate celebratory moment to crack open our pickles and taste the results.  Bottom line--they were delicious, and really tasted like pickles.  The honey added a nice bit of sweetness to it.  I personally wish they had more of a kick, but the spice is just right for our "Northern" friends. 

Spicy Dill Pickle Medallions
6 large cucumbers
1 jalapeno pepper
1 yellow hot pepper
6 cloves garlic
3 cups distilled white vinegar
3 cups filtered water
3 tablespoons kosher salt
1 tablespoon honey
1-2 tablespoon peppercorns
1 tablespoon yellow mustard seeds
6 dill sprigs

Firstly, I suggest following the USDA's recommendations/methods for food canning.  Thoroughly wash all cucumbers, peppers and herbs.  Slice the cucumbers into medallions, throwing away the ends.  Slice peppers lengthwise into quarters, removing all seeds.  Peel garlic cloves.  In a large nonreactive pan, bring to boil vinegar, water, and salt.  Add tablespoon honey.  Stir and let boil for another 7-10 minutes.  Wash jar and lid with hot, soapy water.  Sanitize jar and lid either by boiling or washing in the dishwasher.  (It is also recommended to use a new lid every time you can).  While jar is still hot, carefully pour peppercorns and mustard seed in.  Begin filling the jar with cucumbers.  At 1/4 of the way full, add the dill and garlic.  Then add the remaining cucumbers.  Turn off boiling brine mixture, and after a minute of letting it rest, carefully pour into jar over cucumbers.  Leave between 1/2 inch and 1 inch of headspace in jar.  Use the handle of a sanitized wooden spoon to circulate the inside wall of the jar, in order to release air bubbles.  Place heated lid on jar and tighten.  Immediately refrigerate in order to create a tight seal.  Let rest for 3 weeks minimum.  Consume pickles within one month of opening jar.  Yields two 1-quart jars.            Pin It

Thursday, June 21, 2012

Move It or Lose It

We're back from vacation, and in addition to work and the 50-day Fitness Challenge, my hunnie and I now have the added task of moving!  We recently signed the lease for our new place...a cute little house with light blue trim and a big backyard.  This is going to be a significant space upgrade (from 700 sq. ft. to over 1200 sq. ft).  I'm a planner, and I want to get a head start on the moving process.  I thought I'd share my To-Do checklist...well, more like To-Do guidelines, for a smooth move:
Sort & Donate
 
We sorted (and admittedly continue to sort) through our clothes (& my shoes) selecting any items we don't like, don't fit, are faded or stretched out, or we simply just don't wear.  These are being donated locally. 
Recycle/Upcycle
Trendier or unique items will be sold at the consignment store, while books that we won’t read again will be traded into the local used book store.  We will also drop off some cables, batteries, etc. to the electronics recycling center.
Use or Eat
Over the next couple weeks we will arrange our meals around what we have in the freezer and pantry.  The less food we have to move, the easier.  
Early Packing
We've already started packing, focusing on the clothes/books/kitchenware we don't use frequently.
Researching
We've made a few drives through our new neighborhood, in search of the nearest grocery, bank, coffee shop, restaurants, and running trails.
Sales & Thrifting
Since our next place is much bigger than the last, there will be a few items we need to purchase.  We are on a mission to find a few key items at thrift stores, estate sales, or locally.  We've already snagged a rustic antique cabinet from a yard sale for $45.

Pin It

Thursday, June 14, 2012

Patriotic Patio Oasis

Happy Flag Day everyone! My hunnie and I are getting ready for our trip to California.  When we go, I hope to get a red,white and blue windsock from my favorite little shop along the Bodega coast.  I can remember many a evening watching my parents' Old Glory windsock blowing in the Summer breeze on their patio, and I look forward to continuing the tradition on our patio.  Although it is pretty tiny, our patio is easily one of my favorite places to be.  What started out as 40 square feet of shaded, unused space has turned into a pretty patio garden.  Today I wanted to take a moment to pay tribute to our oasis on the third floor.  While there was a time in our patio's past that flowers and basil grew in pots on our thrifted table, at this moment all that survives are my cherished succulents.    

One of my favorite things about the patio is its homemade touches.  My hunnie made an oil lamp out of an empty liquor bottle (this is our way of recycling) so that we would have some light for our late night grilling.  The vegetable label artwork is hand painted by yours truly in an attempt to bring more color to the patio, and the glass and wire hanging art is from one of the local street fairs.  In case you couldn't tell, I'm a patriotic gal, therefore you'll always find a flag on my porch.  Most importantly, to scare off any third floor patio intruders, we've got our Army men on patrol.  No matter how small our patio is, we've made it an oasis and enjoyed many cups of coffee and glasses of wine here together and with our friends and family.  All it needed was some personal touches to make the patio feel part of our home. Pin It

Thursday, May 17, 2012

Brown Sugar Experiment and Birthday Blondies

It may come to no surprise to you that the desert is very dry.  In knowing this, I have always ensured that I stay hydrated and water my patio garden daily.  However, when it came time to try out a pecan blondies recipe for my hunnie's birthday (as a healthier alternative to his beloved pecan pie), I realized one of the key ingredients had become a victim of this harsh climate--my brown sugar had transformed into a rock.  After unsuccessfully breaking up this sweet mass by banging on the counter top and stabbing with a knife, I resorted to a more scientific solution.  Saturday afternoon I sealed my brown sugar in an airtight bag with a sliced apple.  Come Monday evening I was ready to do some birthday baking, and to my excitement the brown sugar in the sealed bag was softened.  (Need soft brown sugar in a hurry? Microwave it next to a small bowl of water, checking every 20-30 seconds.)


Pecan Blondies

7 tablespoon unsalted butter, melted and slightly cooled
3/4 cup + 2 tablespoon softened, packed brown sugar
1 egg
2 teaspoon vanilla extract
1 1/2 cup all-purpose flour
1/2 teaspoon backing soda
1/8 teaspoon salt
1 cup chopped pecans

Preheat the oven to 350 degrees.  Grease an 8x8 baking pan, place parchment paper on bottom of pan, and then lightly grease parchment paper. 


Combine flour, baking soda and salt.  In a separate bowl, whisk together egg and brown sugar until creamy.  Then whisk in butter and vanilla to wet mixture.  Slowly add dry ingredients to wet ingredients until just combined.  Using a spoon, gently add pecans to mixture.  Spread in baking pan and use spatula to gently press and smooth the top.  Bake approximately 20-25 minutes, until slightly golden on edges and toothpick comes out clean.

Pin It